Technologies/Beast: Difference between revisions
Eheartshine (talk | contribs) No edit summary |
Eheartshine (talk | contribs) |
||
| (4 intermediate revisions by the same user not shown) | |||
| Line 1: | Line 1: | ||
{{Alphabet TOC | {{Alphabet TOC | ||
|b=Beast Farmstalks | |b=Beast Farmstalks | ||
| Line 8: | Line 7: | ||
}} | }} | ||
= [[File:TechGroup Beast.svg| | = [[File:TechGroup Beast.svg|32px|middle|link=]] Beast = | ||
'''Beast''' [[Technologies]] are specific to captured [[Beasts]]; either built directly on the Beast or otherwise utilizing a Beast to produce Materials. Note that some Beast-related structures, such as the [[Technologies/Food#Egg Harvester|Egg Harvester]], are listed in other categories but can appear with Beast Inspiration if the prerequisite Beast is tamed. | '''Beast''' [[Technologies]] are specific to captured [[Beasts]]; either built directly on the Beast or otherwise utilizing a Beast to produce Materials. Note that some Beast-related structures, such as the [[Technologies/Food#Egg Harvester|Egg Harvester]], are listed in other categories but can appear with Beast Inspiration if the prerequisite Beast is tamed. | ||
| Line 22: | Line 21: | ||
| group=Group 2 | | group=Group 2 | ||
| encyclopedia=A mobile farm that doesn't need tending to and grows on its own. | | encyclopedia=A mobile farm that doesn't need tending to and grows on its own. | ||
| desc= | | desc=The Beast Farmstalks are one of the most reliable methods of [[Materials#Food|Food]] production, since they grow Pears two at a time relatively quickly. While they don't need someone working to produce, a [[Beasts|Beast]] with this Technology built on it will wander away if there is no rider. | ||
| mats={{Material|Bamboo}} {{Material|Logs}} | | mats={{Material|Bamboo}} {{Material|Logs}} | ||
| prod={{Material|Food}} {{Material|Food}} | | prod={{Material|Food}} {{Material|Food}} | ||
| place=Small or Medium Beast | | place=Small or Medium Beast | ||
| footp=None | | footp=None | ||
| props= | | props={{{!}} style="margin-left:20px" | ||
{{{!}} style="margin-left:20px" | |||
{{!}}- | {{!}}- | ||
{{!}} style="min-width:32px" {{!}} [[File:Icon Placement Small or Medium Beast.svg|32px]] {{!}}{{!}} '''Placed on Small or Medium Beast:''' Can only be placed on a Snail, Flathead, Totano, Firebird, or Mastadon. | {{!}} style="min-width:32px" {{!}} [[File:Icon Placement Small or Medium Beast.svg|32px]] {{!}}{{!}} '''Placed on Small or Medium Beast:''' Can only be placed on a Snail, Flathead, Totano, Firebird, or Mastadon. | ||
| Line 34: | Line 32: | ||
{{!}} style="min-width:32px" {{!}} [[File:TechGroup Food.svg|32px]] {{!}}{{!}} '''Food Tech:''' This Technology can also be obtained with a Food Inspiration. | {{!}} style="min-width:32px" {{!}} [[File:TechGroup Food.svg|32px]] {{!}}{{!}} '''Food Tech:''' This Technology can also be obtained with a Food Inspiration. | ||
{{!}}} | {{!}}} | ||
| combos={{{!}} style="margin-left:20px" | |||
{{{!}} style="margin-left:20px" | |||
{{!}}- | {{!}}- | ||
{{!}} {{Unique|Food|Mighty Pie|Beast|Beast Farmstalks|Pear Pie}} | {{!}} {{Unique|Food|Mighty Pie|Beast|Beast Farmstalks|Pear Pie}} | ||
| Line 56: | Line 53: | ||
| place=Small or Medium Beast | | place=Small or Medium Beast | ||
| footp=None | | footp=None | ||
| props= | | props={{{!}} style="margin-left:20px" | ||
{{{!}} style="margin-left:20px" | |||
{{!}}- | {{!}}- | ||
{{!}} style="min-width:32px" {{!}} [[File:Icon Bonus Healing Vapors.png|32px]] {{!}}{{!}} '''Healing Vapors:''' Heal all your wounds, both physical and mental. | {{!}} style="min-width:32px" {{!}} [[File:Icon Bonus Healing Vapors.png|32px]] {{!}}{{!}} '''Healing Vapors:''' Heal all your wounds, both physical and mental. | ||
| Line 63: | Line 59: | ||
{{!}} style="min-width:32px" {{!}} [[File:Icon Placement Small or Medium Beast.svg|32px]] {{!}}{{!}} '''Placed on Small or Medium Beast:''' Can only be placed on a Snail, Flathead, Totano, Firebird, or Mastadon. | {{!}} style="min-width:32px" {{!}} [[File:Icon Placement Small or Medium Beast.svg|32px]] {{!}}{{!}} '''Placed on Small or Medium Beast:''' Can only be placed on a Snail, Flathead, Totano, Firebird, or Mastadon. | ||
{{!}}} | {{!}}} | ||
| combos={{{!}} style="margin-left:20px" | |||
{{{!}} style="margin-left:20px" | |||
{{!}}- | {{!}}- | ||
{{!}} {{Unique|Beast|Beast Incense Emitter|Passive|Incense|Speedy Beast Incense Emitter}} | {{!}} {{Unique|Beast|Beast Incense Emitter|Passive|Incense|Speedy Beast Incense Emitter}} | ||
| Line 87: | Line 82: | ||
| place=Small Beast | | place=Small Beast | ||
| footp=None | | footp=None | ||
| props= | | props={{{!}} style="margin-left:20px" | ||
{{{!}} style="margin-left:20px" | |||
{{!}}- | {{!}}- | ||
{{!}} style="min-width:32px" {{!}} [[File:Icon Placement Snail.svg|32px]] {{!}}{{!}} '''Placed on Small Beast:''' Can only be placed on a Snail, Flathead, Totano, or Firebird. | {{!}} style="min-width:32px" {{!}} [[File:Icon Placement Snail.svg|32px]] {{!}}{{!}} '''Placed on Small Beast:''' Can only be placed on a Snail, Flathead, Totano, or Firebird. | ||
| Line 109: | Line 103: | ||
| place=Small or Medium Beast | | place=Small or Medium Beast | ||
| footp=None | | footp=None | ||
| props= | | props={{{!}} style="margin-left:20px" | ||
{{{!}} style="margin-left:20px" | |||
{{!}}- | {{!}}- | ||
{{!}} style="min-width:32px" {{!}} [[File:Icon Bonus Bloodlust.png|32px]] {{!}}{{!}} '''Bloodlust:''' Nearby units attack 25 percent faster. | {{!}} style="min-width:32px" {{!}} [[File:Icon Bonus Bloodlust.png|32px]] {{!}}{{!}} '''Bloodlust:''' Nearby units attack 25 percent faster. | ||
| Line 116: | Line 109: | ||
{{!}} style="min-width:32px" {{!}} [[File:Icon Placement Small or Medium Beast.svg|32px]] {{!}}{{!}} '''Placed on Small or Medium Beast:''' Can only be placed on a Snail, Flathead, Totano, Firebird, or Mastadon. | {{!}} style="min-width:32px" {{!}} [[File:Icon Placement Small or Medium Beast.svg|32px]] {{!}}{{!}} '''Placed on Small or Medium Beast:''' Can only be placed on a Snail, Flathead, Totano, Firebird, or Mastadon. | ||
{{!}}} | {{!}}} | ||
| combos={{{!}} style="margin-left:20px" | |||
{{{!}} style="margin-left:20px" | |||
{{!}}- | {{!}}- | ||
{{!}} {{Unique|Combat|Barracks|Beast|Beast War Drum|Axe Barracks}} | {{!}} {{Unique|Combat|Barracks|Beast|Beast War Drum|Axe Barracks}} | ||
| Line 140: | Line 132: | ||
| place=Small Beast | | place=Small Beast | ||
| footp=None | | footp=None | ||
| props= | | props={{{!}} style="margin-left:20px" | ||
{{{!}} style="margin-left:20px" | |||
{{!}}- | {{!}}- | ||
{{!}} style="min-width:32px" {{!}} [[File:Icon Bonus Thorns.png|32px]] {{!}}{{!}} '''Thorns:''' Reflects melee damage taken back to the attacker. | {{!}} style="min-width:32px" {{!}} [[File:Icon Bonus Thorns.png|32px]] {{!}}{{!}} '''Thorns:''' Reflects melee damage taken back to the attacker. | ||
| Line 165: | Line 156: | ||
| prod={{Beast|Flathead}} | | prod={{Beast|Flathead}} | ||
| single=Yes | | single=Yes | ||
| props= | | props={{{!}} style="margin-left:20px" | ||
{{{!}} style="margin-left:20px" | |||
{{!}}- | {{!}}- | ||
{{!}} style="min-width:32px" {{!}} [[File:Icon Placement Flathead Egg.svg|32px]] {{!}}{{!}} '''Placed on Flathead Egg:''' Can only be placed on an existing Flathead egg in a nest. | {{!}} style="min-width:32px" {{!}} [[File:Icon Placement Flathead Egg.svg|32px]] {{!}}{{!}} '''Placed on Flathead Egg:''' Can only be placed on an existing Flathead egg in a nest. | ||
| Line 189: | Line 179: | ||
| prod={{Beast|Snail}} | | prod={{Beast|Snail}} | ||
| place=Attachment | | place=Attachment | ||
| props= | | props={{{!}} style="margin-left:20px" | ||
{{{!}} style="margin-left:20px" | |||
{{!}}- | {{!}}- | ||
{{!}} style="min-width:32px" {{!}} [[File:Icon Placement Attachment.svg|32px]] {{!}}{{!}} '''Attachment:''' This structure attaches to a house and overrides its production. | {{!}} style="min-width:32px" {{!}} [[File:Icon Placement Attachment.svg|32px]] {{!}}{{!}} '''Attachment:''' This structure attaches to a house and overrides its production. | ||
| Line 212: | Line 201: | ||
| prod={{Beast|Mastadon}} | | prod={{Beast|Mastadon}} | ||
| single=Yes | | single=Yes | ||
| props= | | props={{{!}} style="margin-left:20px" | ||
{{{!}} style="margin-left:20px" | |||
{{!}}- | {{!}}- | ||
{{!}} style="min-width:32px" {{!}} [[File:Icon Placement Mastadon Shell.svg|32px]] {{!}}{{!}} '''Placed on Mastadon Shell:''' Can only be placed on an existing Mastadon shell. | {{!}} style="min-width:32px" {{!}} [[File:Icon Placement Mastadon Shell.svg|32px]] {{!}}{{!}} '''Placed on Mastadon Shell:''' Can only be placed on an existing Mastadon shell. | ||
| Line 234: | Line 222: | ||
| place=Mastadon | | place=Mastadon | ||
| footp=None | | footp=None | ||
| props= | | props={{{!}} style="margin-left:20px" | ||
{{{!}} style="margin-left:20px" | |||
{{!}}- | {{!}}- | ||
{{!}} style="min-width:32px" {{!}} [[File:Icon Placement Mastadon.svg|32px]] {{!}}{{!}} '''Placed on Mastadon:''' Can only be placed on a tamed Mastadon. | {{!}} style="min-width:32px" {{!}} [[File:Icon Placement Mastadon.svg|32px]] {{!}}{{!}} '''Placed on Mastadon:''' Can only be placed on a tamed Mastadon. | ||
| Line 258: | Line 245: | ||
| place=Mastadon | | place=Mastadon | ||
| footp=None | | footp=None | ||
| props= | | props={{{!}} style="margin-left:20px" | ||
{{{!}} style="margin-left:20px" | |||
{{!}}- | {{!}}- | ||
{{!}} style="min-width:32px" {{!}} [[File:Icon Placement Mastadon.svg|32px]] {{!}}{{!}} '''Placed on Mastadon:''' Can only be placed on a tamed Mastadon. | {{!}} style="min-width:32px" {{!}} [[File:Icon Placement Mastadon.svg|32px]] {{!}}{{!}} '''Placed on Mastadon:''' Can only be placed on a tamed Mastadon. | ||
| Line 282: | Line 268: | ||
| place=Trudger | | place=Trudger | ||
| footp=None | | footp=None | ||
| props= | | props={{{!}} style="margin-left:20px" | ||
{{{!}} style="margin-left:20px" | |||
{{!}}- | {{!}}- | ||
{{!}} style="min-width:32px" {{!}} [[File:Icon Placement Trudger.svg|32px]] {{!}}{{!}} '''Placed on Trudger:''' Can only be placed on a tamed Trudger. | {{!}} style="min-width:32px" {{!}} [[File:Icon Placement Trudger.svg|32px]] {{!}}{{!}} '''Placed on Trudger:''' Can only be placed on a tamed Trudger. | ||
| Line 306: | Line 291: | ||
| place=Walker | | place=Walker | ||
| footp=None | | footp=None | ||
| props= | | props={{{!}} style="margin-left:20px" | ||
{{{!}} style="margin-left:20px" | |||
{{!}}- | {{!}}- | ||
{{!}} style="min-width:32px" {{!}} [[File:Icon Bonus Fire Bombardment.png|32px]] {{!}}{{!}} '''Fire Bombardment:''' Drop fire below to burn the landscape and everything in its path. | {{!}} style="min-width:32px" {{!}} [[File:Icon Bonus Fire Bombardment.png|32px]] {{!}}{{!}} '''Fire Bombardment:''' Drop fire below to burn the landscape and everything in its path. | ||
| Line 313: | Line 297: | ||
{{!}} style="min-width:32px" {{!}} [[File:Icon Placement Walker.svg|32px]] {{!}}{{!}} '''Placed on Walker:''' Can only be placed on a tamed Walker. | {{!}} style="min-width:32px" {{!}} [[File:Icon Placement Walker.svg|32px]] {{!}}{{!}} '''Placed on Walker:''' Can only be placed on a tamed Walker. | ||
{{!}}} | {{!}}} | ||
| combos={{{!}} style="margin-left:20px" | |||
{{{!}} style="margin-left:20px" | |||
{{!}}- | {{!}}- | ||
{{!}} {{Unique|Combat|Powderstack|Beast|Walker Firebombs|Firelance Rifles}} | {{!}} {{Unique|Combat|Powderstack|Beast|Walker Firebombs|Firelance Rifles}} | ||
| Line 321: | Line 304: | ||
{{!}}- | {{!}}- | ||
{{!}} {{Unique|Combat|Grenade Wright|Beast|Walker Firebombs|Firebomb Wright}} | {{!}} {{Unique|Combat|Grenade Wright|Beast|Walker Firebombs|Firebomb Wright}} | ||
{{!}}} | |||
}} | }} | ||
| Line 337: | Line 321: | ||
| place=Walker | | place=Walker | ||
| footp=None | | footp=None | ||
| props= | | props={{{!}} style="margin-left:20px" | ||
{{{!}} style="margin-left:20px" | |||
{{!}}- | {{!}}- | ||
{{!}} style="min-width:32px" {{!}} [[File:Icon Placement Walker.svg|32px]] {{!}}{{!}} '''Placed on Walker:''' Can only be placed on a tamed Walker. | {{!}} style="min-width:32px" {{!}} [[File:Icon Placement Walker.svg|32px]] {{!}}{{!}} '''Placed on Walker:''' Can only be placed on a tamed Walker. | ||
| Line 361: | Line 344: | ||
| place=Walker | | place=Walker | ||
| footp=None | | footp=None | ||
| props= | | props={{{!}} style="margin-left:20px" | ||
{{{!}} style="margin-left:20px" | |||
{{!}}- | {{!}}- | ||
{{!}} style="min-width:32px" {{!}} [[File:Icon Placement Walker.svg|32px]] {{!}}{{!}} '''Placed on Walker:''' Can only be placed on a tamed Walker. | {{!}} style="min-width:32px" {{!}} [[File:Icon Placement Walker.svg|32px]] {{!}}{{!}} '''Placed on Walker:''' Can only be placed on a tamed Walker. | ||
| Line 383: | Line 365: | ||
| place=Walker | | place=Walker | ||
| footp=None | | footp=None | ||
| props= | | props={{{!}} style="margin-left:20px" | ||
{{{!}} style="margin-left:20px" | |||
{{!}}- | {{!}}- | ||
{{!}} style="min-width:32px" {{!}} [[File:Icon Bonus Water Bombardment.png|32px]] {{!}}{{!}} '''Water Bombardment:''' Drop water below to extinguish fires and fertilize soil. | {{!}} style="min-width:32px" {{!}} [[File:Icon Bonus Water Bombardment.png|32px]] {{!}}{{!}} '''Water Bombardment:''' Drop water below to extinguish fires and fertilize soil. | ||
Latest revision as of 21:31, 17 November 2024
| Skip to letter: |
| A • B • C • D • E • F • G • H • I • J • K • L • M • N • O • P • Q • R • S • T • U • V • W • X • Y • Z |
 Beast
Beast
Beast Technologies are specific to captured Beasts; either built directly on the Beast or otherwise utilizing a Beast to produce Materials. Note that some Beast-related structures, such as the Egg Harvester, are listed in other categories but can appear with Beast Inspiration if the prerequisite Beast is tamed.
Beast Farmstalks
| Beast Farmstalks | |
| Health: | 200 |
| Builders: | 2 |
| Karma Cost: | 2 |
| Tech Group: | Group 2 |
| Rarity: | Rare |
| Chance to Appear: | 5.5% |
| Single Use: | No |
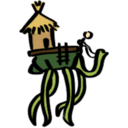
A mobile farm that doesn't need tending to and grows on its own.
— Kainga Encyclopedia
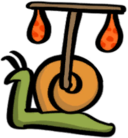
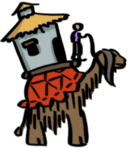
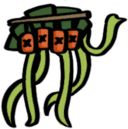
The Beast Farmstalks are one of the most reliable methods of Food production, since they grow Pears two at a time relatively quickly. While they don't need someone working to produce, a Beast with this Technology built on it will wander away if there is no rider.
| Placed on Small or Medium Beast: Can only be placed on a Snail, Flathead, Totano, Firebird, or Mastadon. | |
| Food Tech: This Technology can also be obtained with a Food Inspiration. |
- Unique Combinations:
| + | = |
Beast Incense Emitter
| Beast Incense Emitter | |
| Health: | 800 |
| Builders: | 2 |
| Karma Cost: | 2 |
| Tech Group: | Group 2 |
| Rarity: | Rare |
| Chance to Appear: | 5.5% |
| Single Use: | No |
Softly smelling incense slowly heals your people when they're nearby.
— Kainga Encyclopedia
Any friendly units standing near a Beast with a Beast Incense Emitter attached to it will slowly regenerate any health lost.
| Healing Vapors: Heal all your wounds, both physical and mental. | |
| Placed on Small or Medium Beast: Can only be placed on a Snail, Flathead, Totano, Firebird, or Mastadon. |
- Unique Combinations:
| + | = | |||
| + | = | |||
| + | = |
Beast Saddle
| Beast Saddle | |
| Health: | 800 |
| Builders: | 3 |
| Tech Group: | Starting |
| Rarity: | Common |
| Chance to Appear: | 5.5% |
| Single Use: | No |
Upgrade a tamed Beast to hold 2 passengers or items on top.
— Kainga Encyclopedia
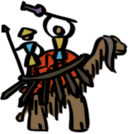
Beasts with a Beast Saddle are able to hold 2 units on their backs, in addition to the handler.
| Placed on Small Beast: Can only be placed on a Snail, Flathead, Totano, or Firebird. |
Beast War Drum
| Beast War Drum | |
| Health: | 300 |
| Builders: | 3 |
| Karma Cost: | 2 |
| Tech Group: | Group 2 |
| Rarity: | Epic |
| Chance to Appear: | 4.6% |
| Single Use: | No |
A loud drum that encourages your people to fight with more vigor.
— Kainga Encyclopedia
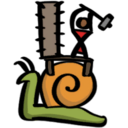
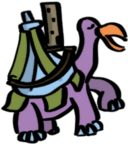
Friendly units near a mounted Beast War Drum attacked 1.25× faster, including the Beast it's mounted on.
| Bloodlust: Nearby units attack 25 percent faster. | |
| Placed on Small or Medium Beast: Can only be placed on a Snail, Flathead, Totano, Firebird, or Mastadon. |
- Unique Combinations:
| + | = | |||
| + | = |
Beast War Rig
| Beast War Rig | |
| Health: | 800 |
| Builders: | 3 |
| Karma Cost: | 2 |
| Tech Group: | Group 1 |
| Rarity: | Rare |
| Chance to Appear: | 4.6% |
| Single Use: | No |
Affix a spiked platform to a Beast that reflects damage taken and provides space for your warriors to fight them.
— Kainga Encyclopedia
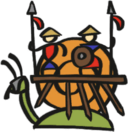
When a Beast War Rig is constructed on a Beast, any melee damage taken is reflected back on the person who dealt the damage. This can be very useful for allowing Beast-mounted units to simply wade into battle without fear of injury.
| Thorns: Reflects melee damage taken back to the attacker. | |
| Placed on Small Beast: Can only be placed on a Snail, Flathead, Totano, or Firebird. |
Egg Excavation Site
| Egg Excavation Site | |
| Health: | 400 |
| Builders: | 3 |
| Karma Cost: | 3 |
| Tech Group: | Group 3 |
| Rarity: | Epic |
| Chance to Appear: | 11.1% |
| Single Use: | Yes |
A site to dig up a Flathead egg in the desert sands.
— Kainga Encyclopedia
Egg Excavation Sites can be used to grow Flathead eggs into mature, tamed Flatheads.
| Placed on Flathead Egg: Can only be placed on an existing Flathead egg in a nest. |
Egg Incubator
| Egg Incubator | |
| Health: | 400 |
| Builders: | 3 |
| Karma Cost: | 3 |
| Tech Group: | Group 3 |
| Rarity: | Epic |
| Chance to Appear: | 11.1% |
| Single Use: | No |
House attachment that slowly grows an egg into a snail.
— Kainga Encyclopedia
An Egg Incubator takes Eggs (either harvested from the Biome or generated with a structure such as the Egg Harvester) and grows them into tamed Snails.
| Attachment: This structure attaches to a house and overrides its production. |
Mastadon Kiln
| Mastadon Kiln | |
| Health: | 400 |
| Builders: | 3 |
| Karma Cost: | 3 |
| Tech Group: | Group 3 |
| Rarity: | Rare |
| Chance to Appear: | 14.8% |
| Single Use: | Yes |
Cover a discarded Mastadon's shell with baked clay to regrow it to full size under your control.
— Kainga Encyclopedia
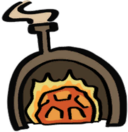
Mastadon Kilns are able to take the remaining shell from a deceased Mastadon and regrow it into a fully-tamed Mastadon.
| Placed on Mastadon Shell: Can only be placed on an existing Mastadon shell. |
Mastadon Saddle
| Mastadon Saddle | |
| Health: | 2000 |
| Builders: | 3 |
| Karma Cost: | 4 |
| Tech Group: | Group 3 |
| Rarity: | Rare |
| Chance to Appear: | 7.4% |
| Single Use: | No |
Upgrade a tamed Mastadon to hold a small house on top.
— Kainga Encyclopedia
Mastadons with a saddle can carry a small (1x2, 2x2, or 4x4 Diamond) Shelter structure on top of them.
| Placed on Mastadon: Can only be placed on a tamed Mastadon. | |
| Nomad Houses: Houses placed on saddles do not require Food to produce. |
Mastadon War Rig
| Mastadon War Rig | |
| Health: | 2000 |
| Builders: | 2 |
| Karma Cost: | 4 |
| Tech Group: | Group 3 |
| Rarity: | Rare |
| Chance to Appear: | 7.4% |
| Single Use: | No |
Upgrade a tamed Mastadon to hold warriors reflect damage taken.
— Kainga Encyclopedia
When a Mastadon War Rig is constructed on a tamed Mastadon, any melee damage taken is reflected back on the person who dealt the damage. This can be very useful for allowing Mastadon-mounted units to simply wade into battle without fear of injury.
| Placed on Mastadon: Can only be placed on a tamed Mastadon. | |
| Thorns: Reflects melee damage taken back to the attacker. |
Trudger Saddle
| Trudger Saddle | |
| Health: | 2000 |
| Builders: | 3 |
| Karma Cost: | 5 |
| Tech Group: | Group 3 |
| Rarity: | Rare |
| Chance to Appear: | 5.5% |
| Single Use: | No |
Upgrade a tamed Trudger to hold a small house on top.
— Kainga Encyclopedia
Trudgers with a saddle can carry a small (1x2, 2x2, or 4x4 Diamond) Shelter structure on top of them.
| Placed on Trudger: Can only be placed on a tamed Trudger. | |
| Nomad Houses: Houses placed on saddles do not require Food to produce. |
Walker Firebombs
| Walker Firebombs | |
| Health: | 800 |
| Builders: | 6 |
| Karma Cost: | 4 |
| Tech Group: | Group 3 |
| Rarity: | Legendary |
| Chance to Appear: | 2.7% |
| Single Use: | No |
Upgrade a tamed Walker to hold Blastpowder barrels to rain fire down below.
— Kainga Encyclopedia
Attaching a pair of Walker Water Jars to a Walker allows it to collect rainwater for future use.
| Fire Bombardment: Drop fire below to burn the landscape and everything in its path. | |
| Placed on Walker: Can only be placed on a tamed Walker. |
- Unique Combinations:
| + | = | |||
| + | = | |||
| + | = |
Walker Saddle
| Walker Saddle | |
| Health: | 2000 |
| Builders: | 3 |
| Tech Group: | Starting |
| Rarity: | Rare |
| Chance to Appear: | 5.5% |
| Single Use: | No |
Upgrade a tamed Walker to hold a small house on top.
— Kainga Encyclopedia
Walkers with a saddle can carry a small (1x2, 2x2, or 4x4 Diamond) Shelter structure on top of them.
| Placed on Walker: Can only be placed on a tamed Walker. | |
| Nomad Houses: Houses placed on saddles do not require Food to produce. |
Walker War Rig
| Walker War Rig | |
| Health: | 800 |
| Builders: | 3 |
| Karma Cost: | 2 |
| Tech Group: | Group 2 |
| Rarity: | Rare |
| Chance to Appear: | 4.6% |
| Single Use: | No |
Upgrade a tamed Walker to hold warriors and hit harder.
— Kainga Encyclopedia
Walkers equipped with a Walker War Rig are able to carry units on their back (most useful for ranged combat units), as well as deal a significantly higher amount of damage when attacking.
| Placed on Walker: Can only be placed on a tamed Walker. |
Walker Water Jars
| Walker Water Jars | |
| Health: | 800 |
| Builders: | 3 |
| Karma Cost: | 2 |
| Tech Group: | Group 3 |
| Rarity: | Epic |
| Chance to Appear: | 3.7% |
| Single Use: | No |
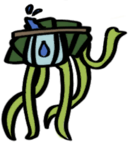
Upgrade a tamed Walker to hold two jars of water to fertilize soil and extinguish fires.
— Kainga Encyclopedia
Attaching a pair of Walker Water Jars to a Walker allows it to collect rainwater for future use.
| Water Bombardment: Drop water below to extinguish fires and fertilize soil. | |
| Placed on Walker: Can only be placed on a tamed Walker. |
